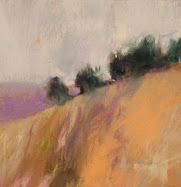
White Bunkhouse
8.75" x 9.5"
Pastel
Casey Klahn
Many, if not most, of the colors in this pastel work are done with my home-made pastels. The blue-grays, one of the oranges, some of the blues, and the grays are my own made-by-hand pastel sticks.
Yesterday, we gathered our tools, and I promised to show you how to make pastels with no expensive purchases, just to get you started. We are going to make a stick from your easel tailings (dust that fell off of your paintings in production). Then, we'll just briefly touch on repairing broken sticks, and then we'll talk about making your own authentic colors.
Yesterday, we gathered our tools, and I promised to show you how to make pastels with no expensive purchases, just to get you started. We are going to make a stick from your easel tailings (dust that fell off of your paintings in production). Then, we'll just briefly touch on repairing broken sticks, and then we'll talk about making your own authentic colors.
 The left over dust from your easel can be segregated at time of gathering to be mostly red, green or whatever. Or, if you just mix them all together, you will get a beautiful gray result. Pour out that jar of tailings onto your smooth-surface work area. Best to have your latex or vinyl gloves and dust mask on, as pigment can be harmful to one's health. Simple precautions should suffice.
We won't need the Gum Trag. or other bodies because your substance already has the manufacturer's binder and body. We're taking our first, easy steps, here.
 Put a paper towel around that spray bottle with a rubber band, so that you can change it out for the next color that you want to mix cleanly. Make a mashed potato-like pile (or a mini volcano, if you will) and spray water into your pigment.
Pastel is a paste, so think pancake batter for consistency.
 Roll the paste in your hand until you achieve a stick. If it's too wet, dab it with a paper towel. If it has cracks, then add a little water at a time until you get it like I show above. I take the extra effort of forming it up against a right angle of glass that I have taped to my glass surface in order to make it square. Many reasons support the square model, but I do it mainly to differentiate my sticks from most store-bought ones. I make them big.
The next few steps will be without photos, but you'll be fine. It's a bear trying to not muck on one's brand new Nikon Camera while making these messy pastels! Also, the next steps are now requiring you to have a supply of white pigment. The photo above shows Whiting, which is a body for making one's own colors, and not the same as white pigment, which I show down below. I bought mine at Daniel Smith, but several suppliers exist. I guess I went with DS because I could visit the retail store in Seattle to hand pick my materials.

- Split your big stick into roughly two equal parts.
- Pour out white pigment on your surface equal to the size of your original pile of pigment.
- Combine the two and spray with a little water. Roll til you get the right consistency, adding or subtracting water as needed.
- Keep following the same regimen of halving each stick and adding white until you get to the last one which will be roughly the size of your first "pure" color stick. Now you have a set of one hue in lightening tints. Perhaps about five or six in all.
- Stop here for now, or decide to make your tones or shades of dark. If you wish to continue, clean your surface completely with glass cleaner, and change out the towel on your spray bottle. Wash, or change your gloves.
- Get out the carbon or lamp black and start over. The blacks come in jars, typically. Of course, a grayer color of each hue may be achieved by mixing hues in the classic painting methods. Another good way to do some minor color mixing is to add liquid pigment, which I also use for underpainting.
Createx Liquid Pigment
 The drying process takes days. Three or more in marine climates (Western Washington, England, etc.) and about three where I live in Eastern Washington (almost out of the marine zone, dryish climate). I took over an old food dehydrator that we had for the purpose, which I'm still in the doghouse with my spouse about ;) You can still test the color even when it's wet, though.
Now that we have done some incredible grays, we can clean up and grab that broken yellow remains, and disperse it as a pile of dust, add water, and roll into a paste. Dry, and there's your long lost buddy!
Now, go here for the super-secret, never before revealed and extra-classified formula for making your own custom colors. I owe Paul de Marrais a debt of gratitude for his openness in revealing this "state" secret. It is, hands down, the most workable and simple formula for starting your exploration into pastel making.
Are you ready for it? 2/3rds Calcium Carbonate (Whiting) to 1/3rd French Talc, and make a paste. SSSHHHHH! Now eat the formula! No! Not the paste, the note! At this point, you'll want to but some dry pigment. I recommend French Ultramarine for starters.
As de Marrias explains, the task is now to take your formula paste and mix it with the pigment, in much the same way that I have taught you to add the white or black. The impact on the color of the pigment is minimal, and you will have a very soft pastel as a result. I have experimented with going half the magic formula, half French Ultramarine pigment, and also with going 2/3rds the blue, and 1/3rd the "body". Both work very well. My next move will be to try to "channel" Henri Roche, and make an almost all pigment blue stick.
Did you notice that we haven't touched the Gum Tragacanth, yet? Keep that bag shut, sports fans. It turns out that many pigments have enough cohesive qualities that the binder isn't needed at all. If you so desire, you may want to experiment with the binder to make harder sticks, which are good for drawing, blocking in, and initial steps of a pastel work.
This brings us to the downside of our subject, which is that all pigments are not created equal. Some have more cohesive characteristics than others. It's just the plain facts of the matter - pigments are derived from natural elements, as well as some man-made efforts such as Manganese Blue, ferric-ferrocyanide (Prussian Blue), and Alizarin (Madder). Blue is one of the happy colors that are easy to work with. The linked websites below have details on what are the troubled pigments - those harder to make into soft, workable sticks. Different amounts of the binder (Gum Tragacanth) and the Whiting/Talc formula are what you'll need to experiment with to get your particular pigment "right".
I have been lucky, so far, with the colors that I have mixed. I have not yet needed a binder to add either cohesion or consistency to any of my pastels.
I also credit Kitty Wallis with giving me my first experiences with home-made pastels. She actually markets a product that takes the mixing of the water out of the equation. She has done the hard part, and put it in a jar for you to just start rolling paste sticks. Her Pastel Moist Pigments can be found here, along with the Createx Liquid Pigments that I really love. I know they are expensive, but the full set will produce more sticks than you can shake a, well, a dollar at. The factor is well in your favor. I came back from Kitty's workshop with eighty sticks, which is greater than $260 worth of the little gems. She also sells them in individual jars, so you don't need to pop for the whole set.
I chose the adventure of making the sticks from scratch, just like any artist who lived before the Nineteenth century had to. I wanted the earthy, craft-side of the artist's tools to be part of my repertoire. I do call myself a "colorist", after all!
Now we have covered making one's own simple grays in multiple values with easel left-overs (the one I made for the photos presented here is already dry and turns out to be a dark violet-gray-which Lorie calls "eggplant"), recovering a broken stick, and two simple resources for how to make soft pastels (de Marrais and Wallis ).
Articles on Making Pastels:
- Paul de Marrais. Via Daniel Smith.
- Katherine Tyrell's Squidoo Lens, and scroll down to "Making your own pastels".
- Sinopia; I emphasize this one which Katherine has linked, because it is relatively simple, and has well organized formulas for given color groups. The groupings are designed to help you get ahead of the curve regarding pigments that are less satisfactory for handling qualities. I suggest letting the pigment tell you first, though. I found that the hansa yellow light from Daniel Smith was fine without binder.
Readable articles about pigments:






7 comments:
Will I ever quit spelling it "grAy"?
I was born and raised in Gray's Harbor (Washington), so I cannot get used to writing "grey" no matter what I do!
ummm I think grey and gray are both ok aren't they?
fascinating article on making pastels - thank you - and lovely work :>)
Yes, either spelling may be acceptable - but not when you're a perfectionist about writing!
Speaking of which, this month is going to be "Write a Critical Article About An Artist Month."
More on that soon.
Thanks for the kudos, Vivien. I only hope to communicate the easy way to begin making pastels for one's self.
This blog is still a prominent Google hit for "make your own pastels" here in 2010, so it would be useful to clarify the exact name of the Createx product that is to be used. Createx makes many products that are called "colors". I gather the product for pastel making is "Createx Liquid Pigment", but currently I don't find this for sale on the Daniel Smith site. Is this product still available? Has it been renamed?
It would be helpful to clarify the current name of the Createx product that is used in making pastels. That company makes many products with titles containing the word "color", but I did not find "Createx Liquid Pigments" for sale on the Daniel Smith site today (March 2010). Is the product still available? Has the name of the product changed?
Thanks for the questions, Stephen. BTW, i am working on an update to this post because of its favor @ Google. I will draw the steps, rather than use photos. Stay tuned.
I just used the product in my studio the other day, but I like it for underpaintings. Not so much for coloring pastels in manufacture. It was fun to try, but it doesn't do great things to them.
Where to get them? Murphy's Law of retailing says if you love a product, it must go out of production. I want Japanese Sakura Carre pastels, but cannot get them - the law rules here.
Dakota offers an ink as a replacement. Here:
http://www.dakotapastels.com/pages/pastelaccessories-primersgrounds.aspx
My comment is that ink is a suspect word for me. Usually ink uses dyes, if I am correct. However, I trust Dakota, so it may be worth looking into. They do use the phrase "heavy pigmentation," and "pigment" is distinguished from "dye."
Katherine van uses this product. She paints with Kitty Wallis, who introduced me to the Createx product. I would say this would be the product to try. It is found at Guerra paints, and I would look under pigment dispersions. Here:
http://www.guerrapaint.com/intro.html
Good luck!
I meant to say Katherine uses the next product, the Guerra dispersion.
Post a Comment