
.jpg)

Let's look at blog banners. Photoshop is a popular tool for making these, and banners and designed graphics add a great touch to your blogs. I can't tell you how to make them, but I will post a video I found that gives an adequate start to your efforts. After the video, I'll mention some easier methods I have found.
My extra tips are to open your image in its file, right click that and select "open with: Photoshop," and this is quicker than browsing from Photoshop. Also, in selecting background and text colors, I use the eye dropper and find a color from my artwork or photo.

I don't copy and paste photos into the new banner background. Instead, I open all the content and view multiple files at once, then I drag and drop like making a puzzle. For instance, I'll open a banner sized at about 800 x 200 pixels, then I will open a photo; select the Arrange Tool, which on my version is in the absolute upper left of the page, next to the pse icon. Now I select the jpeg, and then the Move Tool, and drag the photo jpeg to the banner.
Instead of stretching the text, I prefer to crop the banner to achieve a fit. How to get the text to overlay the images? I work with layers, which is the critical knowledge you need in Photoshop, and then I very carefully go around the letters with the Eraser Tool. There must be an easier way, but that's my solution.*
Linda Rosso, of Mill Valley, CA, has a new blog about plein air painting and art marketing is also her area of expertise. I follow her new blog, and I liked her footer signature block so much that I went into Photoshop and designed one for my blogs. I know The Colorist gets a lot of random traffic, and this is a good way to provide an introduction within each post.
Plein Air Liason, by Linda Rosso.
* Artist Gary Huber informs me that I should try a setting where the text background is transparent. Goodbye Eraser Tool! I tested his solution, however when I opened the text layer it was transparent by default. Go figure. At any rate, the solution does work and you need to work with Layer and Arrange, then push the picture to the bottom layer. Also, another tip: remember to merge or flatten your finished image.
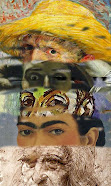
My new signature block:


4 comments:
Good, useful post Casey. Should be within the ability of the average PC user with basic Photoshop skills.
Niall
Niall, I agree. Don't be afraid of Photoshop, and a little bit of instruction and one ought to be on the way.
Thanks, Casey. And your new signature block is mighty fine!
Hi, Linda! Thanks for the idea. I didn't put a link in there since the blog has plenty.
Post a Comment